 Save to Pinterest
 Create bakery-quality brioche at home with this straightforward method. These golden rolls deliver unmatched tenderness through generous butter incorporation and proper kneading technique. The dough requires patience during two rising periods, resulting in pillowy texture that elevates everything from morning jam spreads to evening dinner accompaniments. Perfect for special occasions or weekend baking when you want fresh, warm bread that rivals any artisan bakery.
My tiny apartment kitchen smelled like a French bakery at 7am, which felt absurd until I realized these golden brioche rolls were actually mine. I'd started the dough the night before after an exhausting shift at work, wanting something that felt like self-care but wasn't complicated. That first warm bite, slathered with salted butter, made waiting through two rises feel like the easiest decision I'd ever made.
Last Thanksgiving I made three batches because my cousin kept eating them straight from the cooling rack. My aunt finally caught him hiding the last roll in his pocket like a guilty squirrel, claiming he was saving it for the drive home. Now I double whatever amount I think I need, because somehow these rolls vanish faster than anything else on the table.
Ingredients
- All-purpose flour: The structure that holds all that buttery richness without collapsing
- Granulated sugar: Just enough to feed the yeast and give a subtle sweetness
- Instant dry yeast: Skip the proofing step and get straight to making magic happen
- Fine sea salt: Balances the richness and actually enhances the buttery flavor
- Large eggs: Room temperature eggs incorporate better and create that signature tender crumb
- Whole milk: Lukewarm milk activates the yeast without killing it
- Unsalted butter: Softened and cubed this transforms a basic dough into something extraordinary
- Egg wash: The secret to that gorgeous burnished golden finish
Instructions
- Mix the dry foundation:
- Combine flour sugar yeast and salt in your stand mixer bowl giving everything a quick whisk to distribute the yeast evenly.
- Build the dough:
- Add those room temperature eggs and lukewarm milk mixing on low until you see a shaggy rough dough coming together.
- Work in the butter:
- With the mixer running on medium drop in those butter cubes one at a time waiting for each to disappear before adding the next then let it knead for 8 to 10 minutes until the dough is smooth and pulls away from the bowl.
- First rise:
- Transfer your dough to a lightly greased bowl cover it and find the warmest corner of your kitchen for at least an hour until it's doubled in size.
- Shape the rolls:
- Punch down that puffy dough divide it into 12 equal pieces and shape each into a smooth tight ball using your cupped hand.
- Second rise:
- Arrange your dough balls in a greased 9x13 inch pan or on a lined baking sheet cover them and let them proof for 45 to 60 minutes until they're puffy and touching.
- Heat the oven:
- Preheat to 350F so it's fully ready when your rolls have finished their final rise.
- Give them that glow:
- Whisk the egg and milk together then gently brush the tops of your puffy rolls being careful not to deflate them.
- Bake to golden:
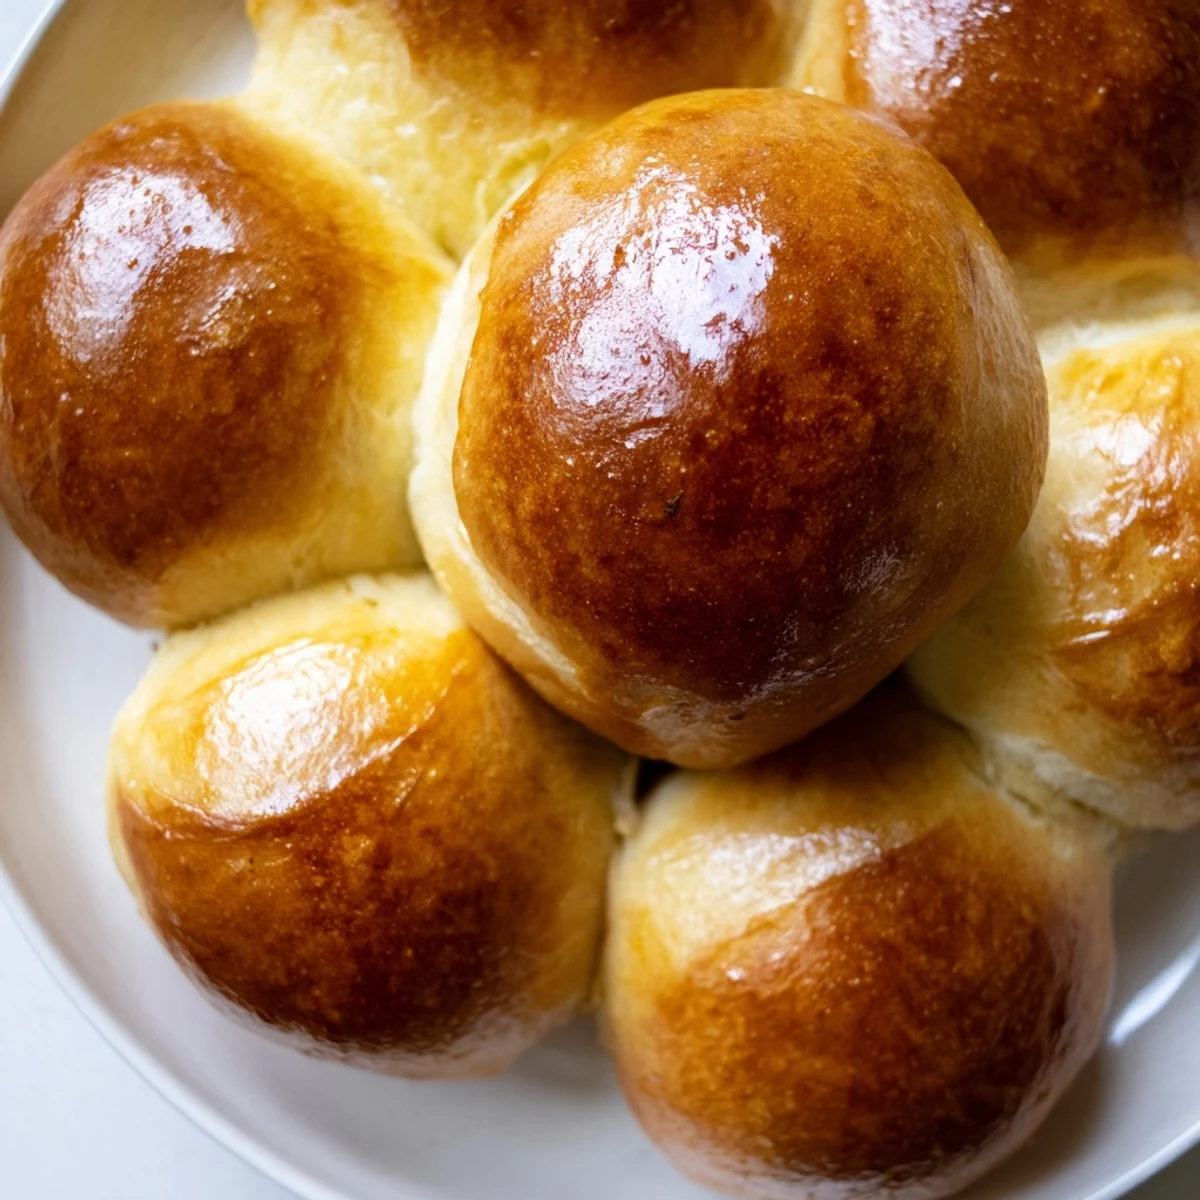
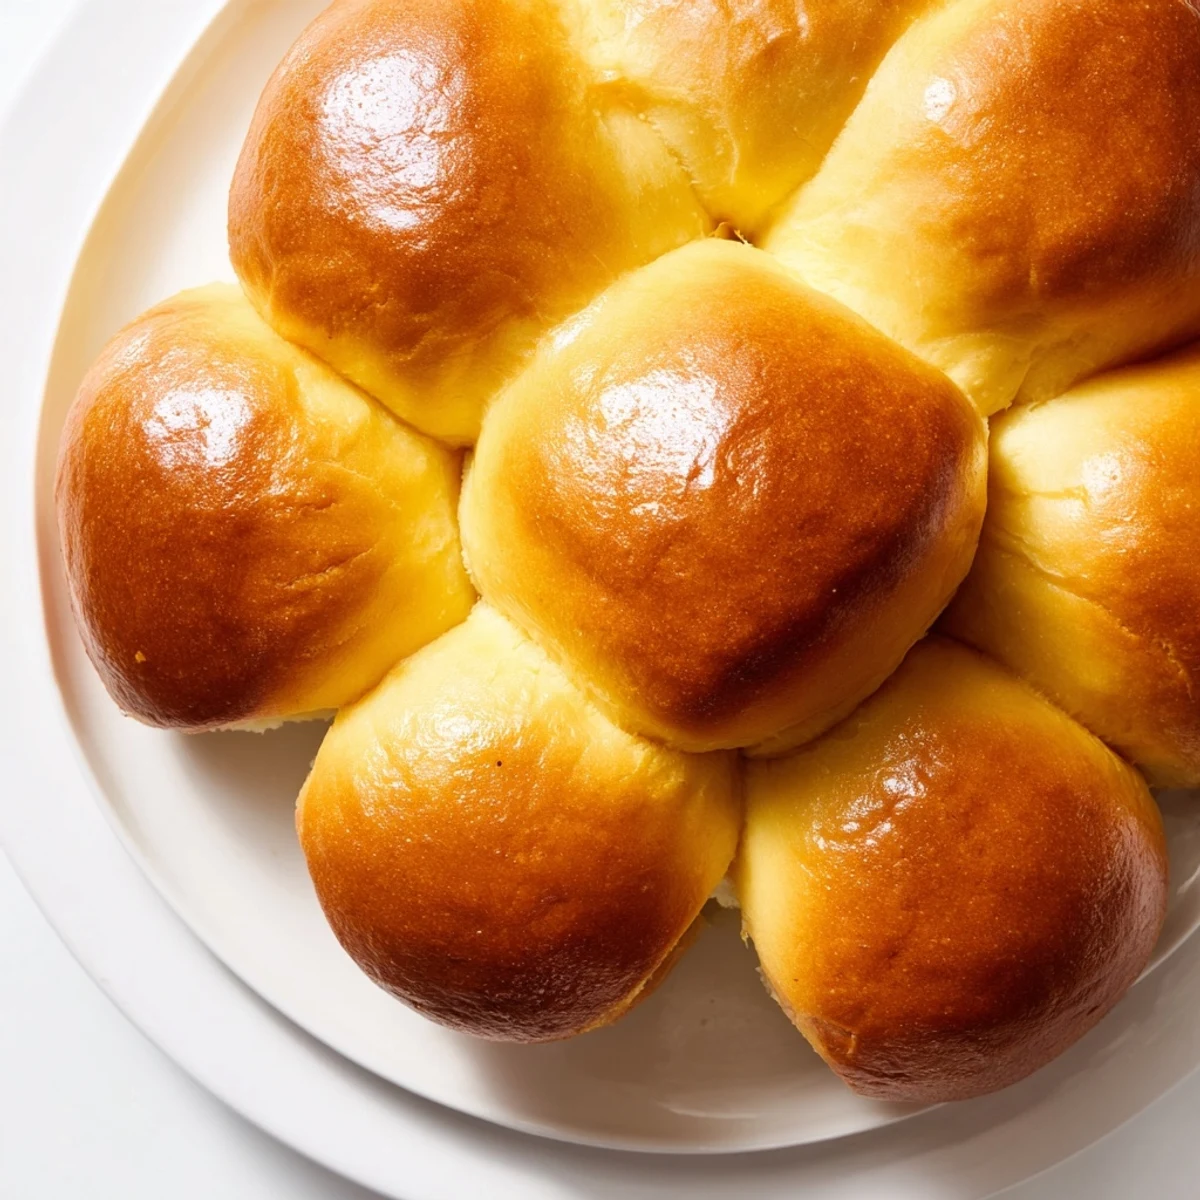
- Slide the pan into the oven for 18 to 22 minutes until the tops are deeply golden and they sound hollow when tapped.
- Warm finish:
- Let them cool just enough to handle then serve them still warm with butter that melts into every crevice.
 Save to Pinterest
 My grandmother would sit at the kitchen table watching me shape each roll telling me stories about learning to bake during rationing. She said bread was always worth the effort because feeding someone something you made with your hands was the oldest kind of love there is. Now whenever I make these I can still hear her voice saying that nothing worth having comes without a little patience.
Getting That Perfect Rise
Yeast is alive and it needs warmth but not heat to work its magic. I've learned the hard way that a cold kitchen means sluggish dough so I'll preheat my oven for just one minute then turn it off and create a cozy proofing box inside. The rolls should feel alive under your fingers almost bouncy and that's how you know they're ready for the oven.
Make Ahead Magic
These rolls are actually better when you plan ahead because an overnight slow rise in the refrigerator develops incredible flavor. The cold fermentation makes the dough easier to shape too since it's less sticky and more cooperative. Just let the dough come to room temperature for about 30 minutes before shaping and you'll have bakery quality results with half the morning stress.
Serving Ideas That Shine
These brioche rolls are incredibly versatile and can anchor any meal from casual weeknight dinners to holiday spreads. Their slightly sweet buttery profile makes them perfect for both savory and sweet applications depending on your mood or menu.
- Split and toast for the most incredible breakfast sandwich with scrambled eggs
- Use day old rolls to make bread pudding that will convert any skeptic
- Brush warm rolls with honey butter and serve alongside Sunday brunch
 Save to Pinterest
 There's something deeply satisfying about pulling a pan of golden rolls from the oven and watching everyone's face light up. These might just become the recipe your family asks for again and again.
Recipe Questions & Answers
- → What makes brioche different from regular bread?
-
Brioche contains significant butter and eggs, creating tender crumb and rich flavor. Unlike lean breads relying on flour and water alone, the high fat content produces soft texture and golden color characteristic of French enriched doughs.
- → Why add butter gradually instead of all at once?
-
Incorporating butter in stages allows proper gluten development before fat interference. This technique ensures dough maintains structure while achieving ultimate richness. Adding cold or melted butter disrupts protein networks, potentially resulting in dense texture.
- → Can I make these without a stand mixer?
-
Hand kneading works perfectly, though requiring more effort and time. Mix ingredients in a large bowl, turn onto floured surface, and knead for 15-20 minutes until smooth. The windowpane test indicates proper development—stretch a small dough portion; it should thin without tearing.
- → How do I know when the dough has doubled during rising?
-
Press gently with floured finger. If indentation remains slowly without springing back, dough has risen sufficiently. Visual assessment works too—look for volume doubling and smooth, dome-shaped surface. Environmental factors affect timing, so visual cues prove more reliable than minutes.
- → What's the best way to store and reheat leftover rolls?
-
Room temperature storage in airtight bags keeps rolls fresh 2-3 days. For longer keeping, freeze individually wrapped, then thaw at room temperature or refresh in 350°F oven for 5-7 minutes. Avoid refrigeration, which accelerates staling. Reheating restores fresh-baked warmth and crisp exterior.
- → Can I prepare the dough ahead and bake later?
-
After first rise, punch down dough, wrap tightly, and refrigerate up to 24 hours. Cold fermentation enhances flavor development. Let come to room temperature 45 minutes before shaping and proceeding with second rise. This flexibility helps timing for special occasions.
