 Save to Pinterest
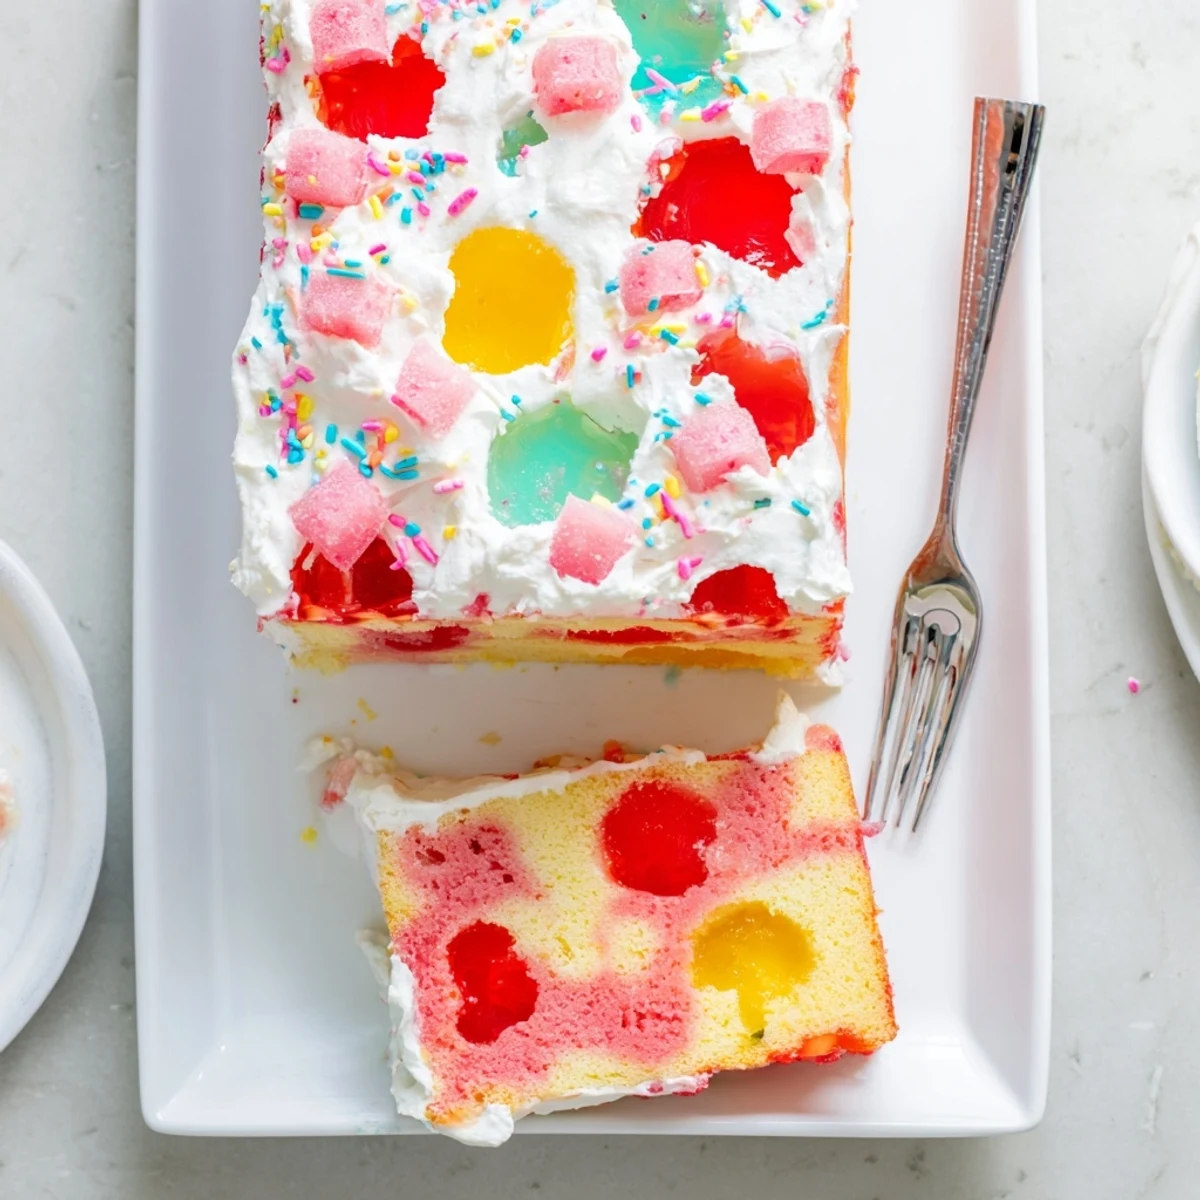
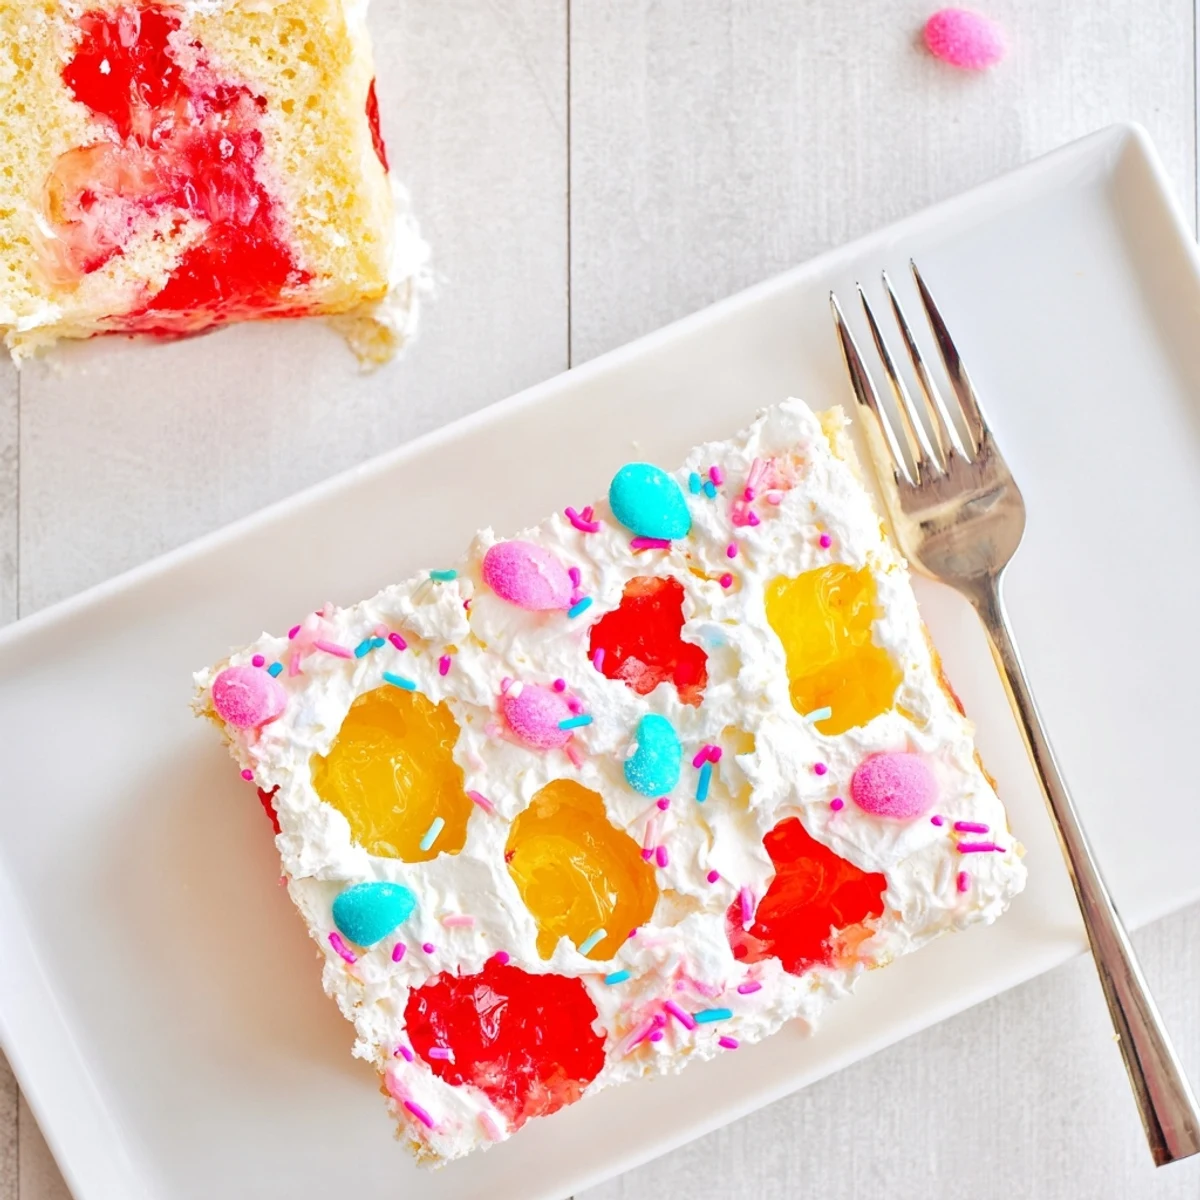
 This vibrant Easter dessert starts with a moist vanilla cake baked to golden perfection. While still warm, the cake is dotted with dozens of small holes, then infused with alternating pools of strawberry and lemon gelatin that seep into every crevice. After chilling until set, the entire creation is crowned with clouds of sweetened whipped cream and playful pastel sprinkles.
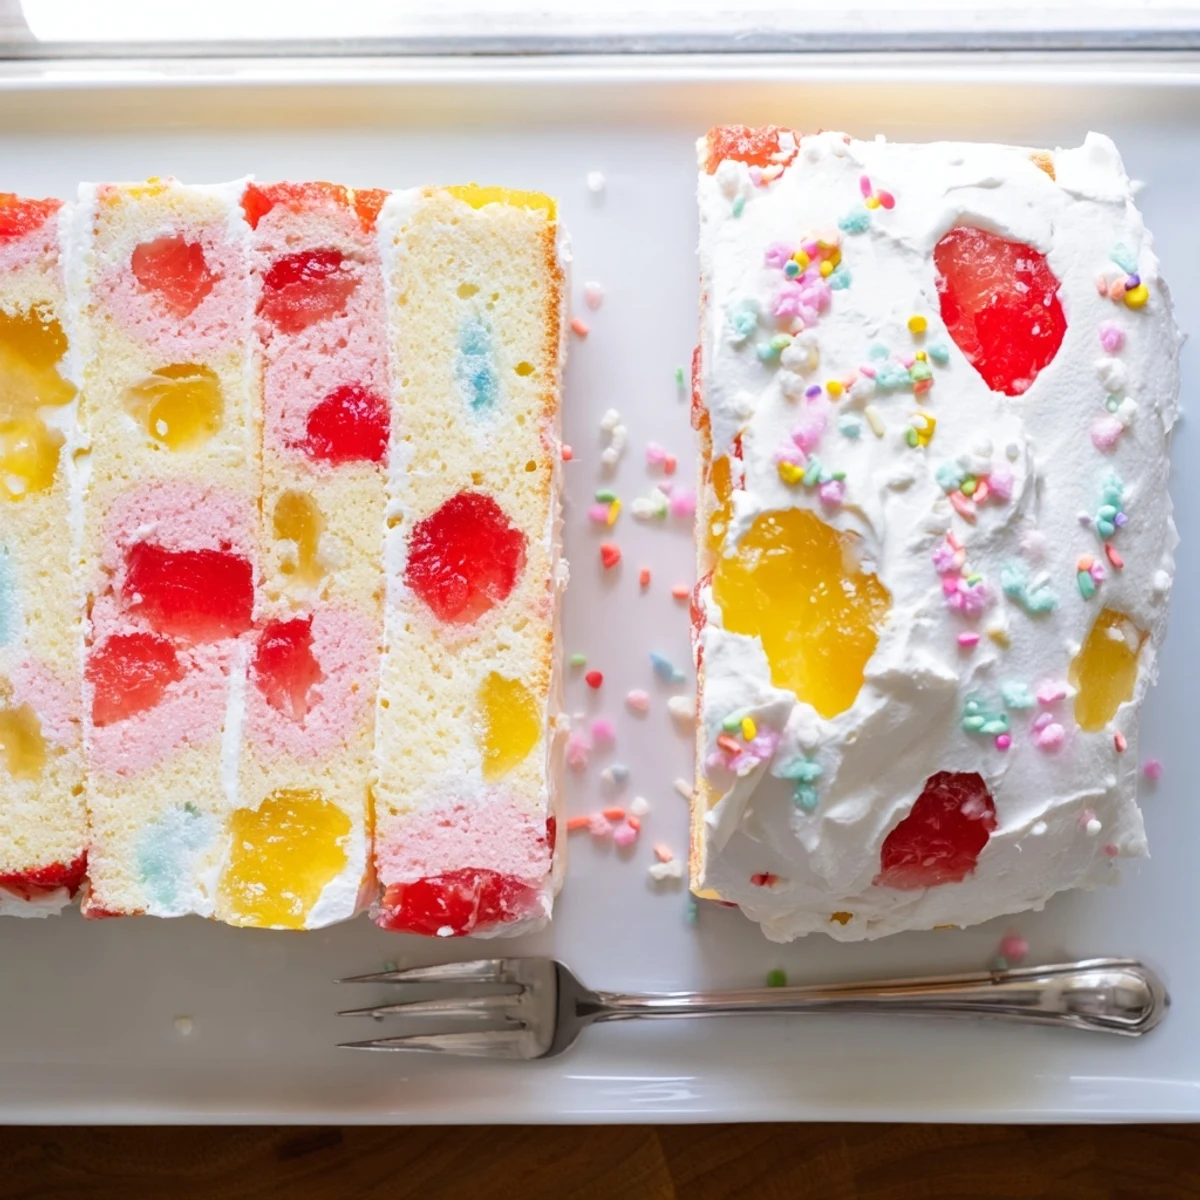
The result is a stunning marbled effect that tastes as festive as it looks. Each bite offers the perfect balance of tender cake, fruity gelatin pockets, and creamy topping. Ideal for spring gatherings, this make-ahead dessert serves 12 and can be prepared the day before.
The kitchen counter looked like a pastel explosion when I first attempted this Easter poke cake. I'd planned a perfectly marbled masterpiece, but my three year old grabbed the strawberry gelatin bowl and decided both halves needed to be her favorite color. That chaotic Sunday became the start of our family tradition because sometimes the best memories happen when you surrender control.
Last year my neighbor Sarah brought this to our potluck and watched everyone's face light up when they cut into it. She'd spent the morning carefully alternating the gelatin colors in a perfect pattern and refused to tell us her secret until we'd all taken our first bites. The jelly bean garnish sparked a twenty minute conversation about everyone's favorite discontinued Easter candy flavors.
Ingredients
- Vanilla cake mix: The foundation that absorbs all that fruity goodness and stays impossibly moist even after sitting in the fridge overnight
- Water oil and eggs: Standard cake mix ingredients but room temperature eggs make a noticeable difference in texture
- Strawberry and lemon gelatin: Classic Easter colors that give you that perfect balance of sweet and slightly tart running through each slice
- Boiling and cold water: The hot water dissolves the gelatin completely while cold water brings it to the right consistency for soaking into the cake
- Heavy whipping cream: Cold heavy cream whips up best and creates that luxurious topping that balances the sweet gelatin underneath
- Powdered sugar: Just enough sweetness to stabilize the cream without making it cloying
- Vanilla extract: Pure vanilla extract makes the whipped cream taste like something you'd get at a fancy bakery
- Pastel sprinkles or jelly beans: Totally optional but they make this look like it came straight from a professional bakery window
Instructions
- Bake your vanilla cake:
- Preheat that oven to 350°F and grease your 9x13 inch pan like your life depends on it. Mix up the cake batter exactly as the box says using the water oil and eggs then pour it in and bake for about 30 minutes until a toothpick comes out clean.
- Poke those holes:
- Let the cake cool for exactly 15 minutes not a minute longer or the holes won't hold their shape. Use the handle of a wooden spoon to poke holes all over the cake about an inch apart in nice even rows.
- Prepare the gelatin magic:
- In two separate bowls dissolve each flavor of gelatin in one cup of boiling water stirring until you can't see any grains anymore. Add one cup of cold water to each bowl and let them cool down just slightly so they're not scorching hot.
- Create your pattern:
- Pour the strawberry gelatin over one half of the cake and the lemon over the other half watching it disappear down into all those little holes. If you want a marbled look just alternate spoonfuls of each flavor across the whole thing and let them swirl together.
- Chill until set:
- Cover the pan and stick it in the fridge for at least two hours but honestly three is better for that perfectly wobbly texture. The gelatin needs time to set completely so each slice holds its shape when you cut it.
- Make the whipped topping:
- Whip that cold heavy cream with the powdered sugar and vanilla until you get stiff peaks that stand up on their own. Spread it generously over the entire chilled cake making sure to seal in all that fruity goodness.
- Add the finishing touches:
- Sprinkle pastel sprinkles or arrange jelly beans on top right before serving because they'll start to bleed color into the cream if they sit too long. Cut into squares and watch everyone's face when they see that colorful surprise inside.
 Save to Pinterest
 My aunt made this for our family reunion one year and accidentally used lime gelatin instead of lemon. Everyone pretended not to notice the green streak running through the pink half because she was so proud of her creation. That tiny mistake became our running joke for the next decade whenever anyone brought out a colorful dessert.
Making It Ahead
This cake actually tastes better after sitting in the fridge overnight because all the flavors have time to mingle and the texture becomes even more pudding like. The gelatin continues to work its magic slowly absorbing into every crumb.
Flavor Variations
Berry blue gelatin creates a stunning Easter egg blue effect while orange gelatin gives you that classic creamsicle vibe. Lime adds a zesty brightness that cuts through all that sweetness especially if you use a yellow cake base instead of vanilla.
Serving Tips
Cutting this cake with a wet knife helps you get clean slices without dragging the whipped cream all over the place. Dip your knife in hot water between each cut and wipe it clean for picture worthy portions.
- Let the cake sit at room temperature for about ten minutes before serving so the gelatin softens slightly
- Glass baking dishes show off those colorful layers better than metal pans
- Leftovers keep for three days in the fridge if covered tightly
 Save to Pinterest
 There's something about cutting into this cake and seeing those bright colors peeking through that makes even the most serious adults smile like little kids. Easter desserts should feel this joyful.
Recipe Questions & Answers
- → How far in advance can I make this?
-
You can prepare this dessert up to 24 hours ahead. The gelatin needs at least 2 hours to set properly, and the flavors actually develop better after chilling overnight. Store covered in the refrigerator until ready to serve.
- → Can I use different gelatin flavors?
-
Absolutely! Feel free to experiment with berry blue, lime, orange, or raspberry gelatin. Using three or four colors creates an even more vibrant marbled effect. Just maintain the same ratios of boiling and cold water for each flavor.
- → Should the cake be warm or cool when poking?
-
Let the cake cool for about 15 minutes after baking. It should be warm to the touch but not hot. This temperature allows the gelatin to absorb nicely while preventing the cake from becoming soggy or falling apart when poked.
- → Can I use homemade cake instead of boxed mix?
-
Yes, a homemade vanilla or yellow cake works beautifully. Just ensure it's a sturdy enough batter to hold the gelatin infusion. Avoid angel food or chiffon cakes as they're too delicate.
- → How do I prevent the gelatin colors from mixing too much?
-
Pour slowly and deliberately into separate sections of the cake. You can use a spoon to guide the liquid into specific areas. The natural marbling that occurs is part of the charm, so don't worry about perfect separation.
- → Can I freeze this dessert?
-
Freezing isn't recommended as the gelatin texture changes and the whipped cream can weep. This dessert is best enjoyed fresh from the refrigerator within 2-3 days of preparation.
