 Save to Pinterest
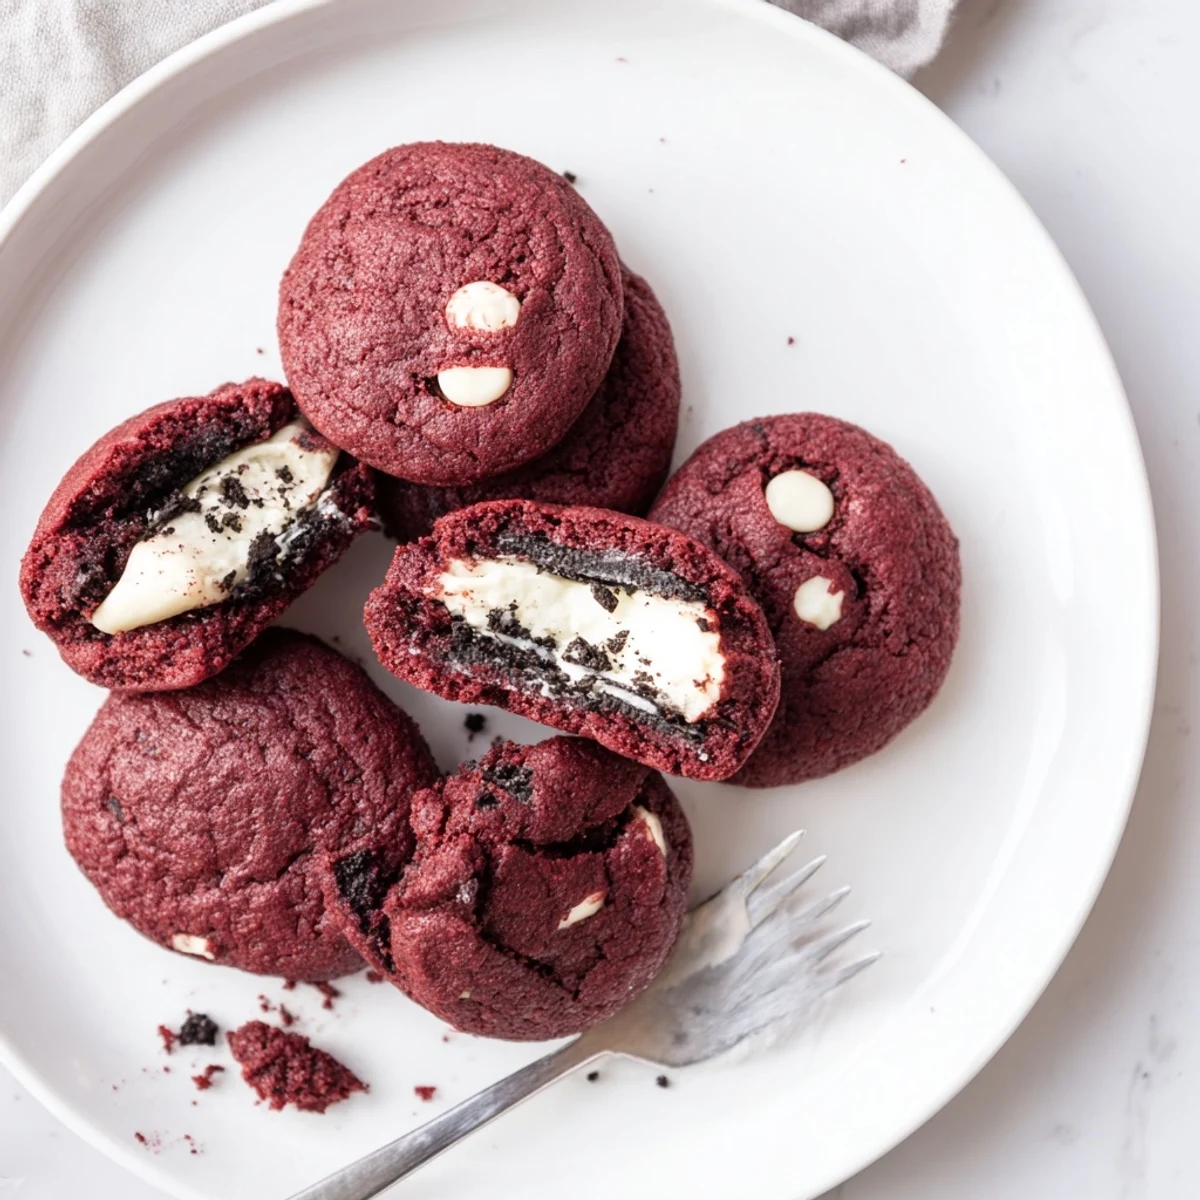
 These stuffed red velvet cookies combine the classic velvet texture with cocoa and white chocolate chips. The hidden Oreo cream filling adds a surprising creamy center that oozes with every bite. Perfect for holidays, parties, or when you want to elevate your cookie game.
The winter I first attempted these cookies, my kitchen looked like a crime scene. Red food coloring everywhere, flour dusted across every surface, and me laughing at my own reflection covered in pink specks. My roommate walked in, took one look at the chaos, and asked if I'd been crafting handmade paper instead of baking. That first batch taught me that red velvet demands patience and a very good apron.
I brought a batch to my office holiday potluck last year, and within fifteen minutes, three different coworkers had asked for the recipe. Watching people bite into that first cookie and their eyes widen at the creamy center—that's the kind of kitchen moment that keeps you baking. Someone actually accused me of buying them from a fancy bakery, which I took as the highest compliment.
Ingredients
- All-purpose flour: The structure that holds everything together—sift it once if you want extra-tender crumb
- Unsweetened cocoa powder: Red velvet isn't chocolate cake, but that hint of cocoa is what makes it taste like itself
- Baking soda: Gives these cookies their signature puffy center and slightly crisp edges
- Salt: A half teaspoon might seem small, but it makes every other ingredient taste more like itself
- Unsalted butter: Room temperature is non-negotiable here—cold butter creates tough cookies
- Granulated sugar: Creates that crackly exterior that makes them look bakery-perfect
- Light brown sugar: Adds moisture and a subtle caramel depth that white sugar alone can't provide
- Large egg: Bind everything together while adding richness—let it come to room temperature too
- Milk: Just enough to bring the dough together without making it sticky
- Vanilla extract: Two teaspoons might feel generous, but red velvet needs all the help it can get in the flavor department
- Red food coloring: Gel gives you that dramatic crimson without adding excess liquid
- White chocolate chips: The creamy sweetness that balances cocoa's slight bitterness
- Cream cheese: Use full-fat and let it soften completely for the silkiest filling
- Powdered sugar: Sift it first or your filling will have stubborn lumps
- Oreo cookies: Eight cookies crushed into the filling creates that cookies-and-cream surprise inside every bite
Instructions
- Get your oven ready:
- Preheat to 350°F and line two baking sheets with parchment paper—this small step saves you from scrubbing baked-on sugar later
- Whisk the dry team:
- In a medium bowl, combine flour, cocoa, baking soda, and salt until evenly distributed
- Cream the butter and sugars:
- Beat them together for about three minutes until the mixture looks pale and fluffy—this creates air pockets that make cookies tender
- Add the wet ingredients:
- Pour in egg, milk, vanilla, and red food coloring, mixing until everything is fully incorporated
- Combine the mixtures:
- Gradually add dry ingredients to the wet mixture, then fold in white chocolate chips until just combined
- Make the filling:
- Beat cream cheese and butter until smooth, then mix in powdered sugar and vanilla before folding in crushed Oreos
- Chill the filling:
- Refrigerate for ten minutes so it's firm enough to handle without making a mess
- Stuff the cookies:
- Flatten dough portions, add a teaspoon of chilled Oreo filling to each center, then carefully seal the edges
- Bake until just set:
- Eleven to twelve minutes is perfect—edges should look firm while centers still appear slightly soft
- Cool completely:
- Let them rest on the baking sheet for five minutes before moving them to a wire rack
 Save to Pinterest
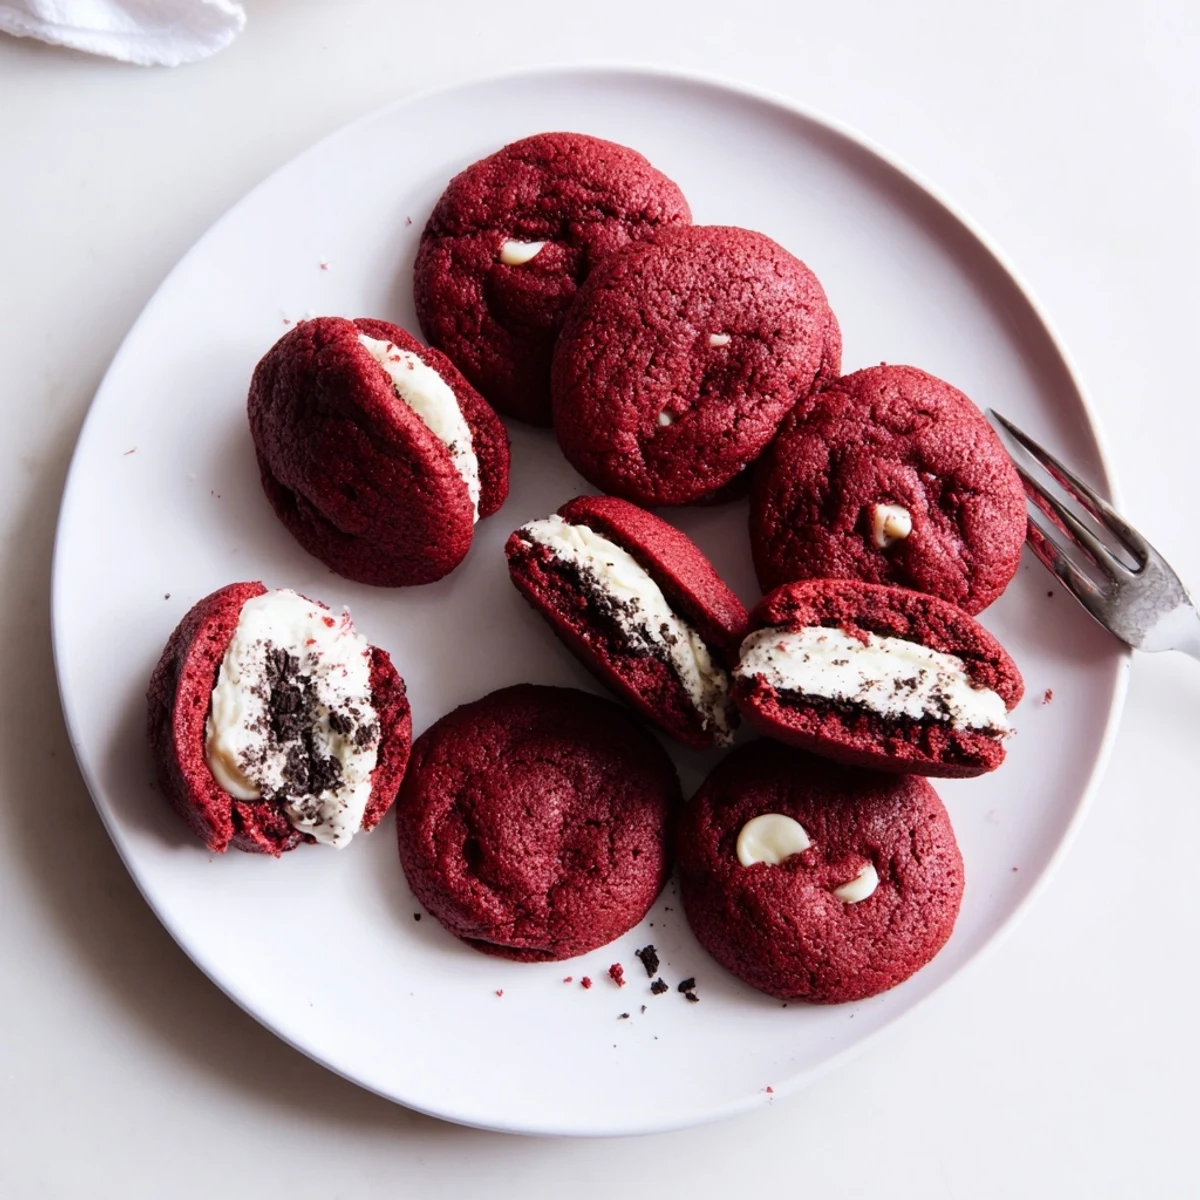
 My mom called me after she tried these, convinced I'd spent hours on them. The truth is, the assembly goes quickly once you get the rhythm down, and hearing her describe how she and my dad split one after dinner made every red-speckled minute worth it. Some cookies are just meant for sharing.
Making Ahead
You can prepare the cookie dough up to two days in advance and store it in the refrigerator. The Oreo filling keeps for three days in an airtight container, though I've never managed to keep it around that long without snacking.
Storage Secrets
These cookies stay fresh for three days at room temperature in a sealed container. For longer storage, freeze the baked cookies for up to two months and let them thaw at room temperature before serving.
Serving Ideas
Warm one in the microwave for fifteen seconds and serve with vanilla ice cream for an instant dessert that feels fancy. These also make incredible holiday gifts layered in mason jars with the filling in a separate container.
- Crumble leftover cookies over chocolate pudding for an unexpected topping
- Pair with a glass of cold milk or hot coffee depending on the season
- Serve these slightly warm for the ultimate gooey Oreo center experience
 Save to Pinterest
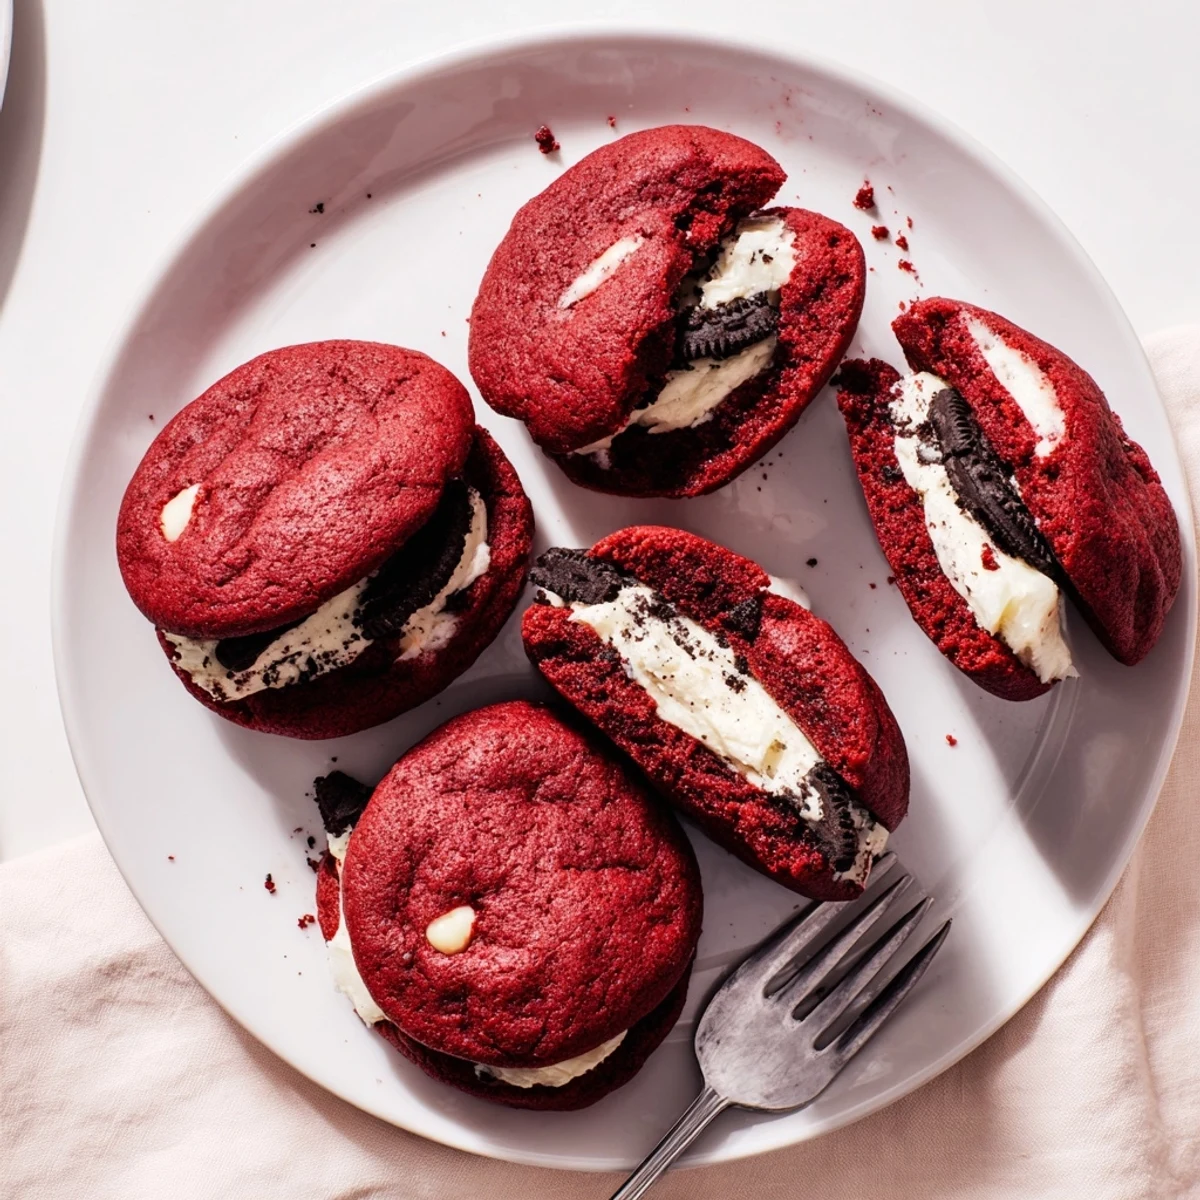
 There's something about biting into a cookie that looks ordinary and finding that surprise Oreo center. These have become my go-to for moments that call for a little extra celebration.
Recipe Questions & Answers
- → Can I make the dough ahead of time?
-
Yes, prepare the dough and filling separately. Store both in the refrigerator for up to 24 hours. Let the dough soften slightly at room temperature before stuffing and baking.
- → Why chill the Oreo filling before assembling?
-
Chilling makes the filling firmer and easier to handle. This prevents it from oozing out when you wrap the cookie dough around it and helps maintain its shape during baking.
- → Can I freeze these cookies?
-
Freeze unbaked stuffed dough balls on a baking sheet, then transfer to a freezer bag. Bake from frozen, adding 1-2 minutes to the baking time. Baked cookies freeze well for up to 3 months.
- → What if I don't have red food coloring?
-
You can omit it entirely for chocolate velvet cookies, or use natural alternatives like beet juice. The flavor remains delicious without the coloring—it just won't have that signature red hue.
- → How do I know when they're done baking?
-
The edges should look set and slightly firm, while the centers may still appear soft. They'll continue cooking on the hot baking sheet, so removing them at this stage ensures perfectly chewy results.
- → Can I use different cookie fillings?
-
Absolutely! Try cream cheese frosting, peanut butter, Nutella, or even mint chocolate chip filling. The red velvet base pairs beautifully with various creamy centers.
